


Technical Support
Yes, we can offer remote support, depending on your situation. Please call us on 01604 422422 to speak to one of our experts. For our remote support software, please click here.
For technical support on all of our printers and software, please call 01604 422422.
Ordering
All stock items can be ordered through our website.
Personalised ID cards can be ordered online using our easy ID card builder. If you require 250 cards or more, or if your requirements are more complex (eg. programmed technology cards), contact us for a fast quote based on what you need.
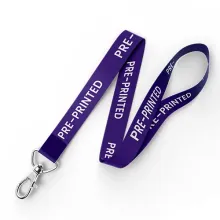
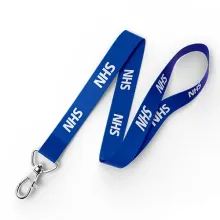
For printed lanyards, please contact us at 01604 422422 or email sales@idcardcentre.co.uk
This is dependent on the product. Many of our products are shipped in packs- in which case the minimum quantity will be specified on the product page.
For printed ID cards, we have a minimum order quantity of 10.
Quantities for personalised lanyards start at 100 or 50 with our express 3 or 5-day services.
Please contact us on 01604 422422 or at sales@idcardcentre.co.uk ASAP if you need to amend or cancel your order.
Please note that cancellation charges may apply if production has already started on your order.
In the first instance, please follow the UPS tracking information if available (please see ‘Delivery Information’ below).
Otherwise, please get in touch with us at 01604 422422 or sales@idcardcentre.co.uk.
Please contact us within 7 days of receipt of your order, quoting your order number and details of the missing item/s, and we will investigate and get back to you within 24 hours.
Please contact us within 7 days of receipt of your order, quoting your order number and details of the faulty item/s, and we will investigate and get back to you within 24 hours.
Your item will be sent out as soon as we receive stock from the manufacturer/supplier. Please contact us for an update on when this will be.
If you have an ID-related requirement but can't find what you're looking for on our website, please call us 01604 422422 or send us an email to sales@idcardcentre.co.uk.
We will always try to help in sourcing and supplying what you need or advising you as best as we can.
Paper catalogues are so last year, don't you think?
Every single product that we sell is here on our website for you to find out more information, see our best pricing and place an order.
Payment
On our website, each product shows the price exclusive and inclusive of VAT at the current UK rate of 20%.
VAT may or may not be added to your order on checkout based on the following:
| Delivery address in the UK | VAT is to be added |
| Delivery address inside the EU and valid EU VAT number is supplied | VAT will not be added |
| Delivery address outside of the EU | VAT will not be added |
Immediately via Sage Pay or PayPal.
A VAT invoice will be emailed to you upon completion of your order.
Please send an email to accounts@idcardcentre.co.uk with confirmation of your order and the company details required on the invoice, and we’ll send a VAT invoice to you.
We endeavour to offer the best possible prices to our customers. Therefore if you’ve received a cheaper quote elsewhere for exactly the same product or service, please let us know, and we’ll do our best to match or beat it.
We accept credit cards (including Amex) and debit cards via Sage Pay or PayPal. We also accept cheques and BACS/CHAPS payments.
Delivery Information & Charges
You will receive an email from UPS when the shipment has been raised and then another email with the delivery details, including your tracking number.
Your tracking number will be emailed to you when the shipment is booked in.
You can track your order by following this link or via the UPS website (choosing the UK as the location).
All orders for stock items received prior to 2.30pm will be dispatched the same day. It may still be possible to dispatch orders after this time, so if your order is urgent, please call us to check.
If an item is out of stock, you will be notified immediately and advised how quickly we can get it out to you.
Your order will be delivered during office hours and will require a signature.
If you require your order to be delivered to an offsite location – for example, a hotel, temporary office, etc., please give us as much information as possible about how to get your delivery to you, including a contact name and number for the person on site.
If you require delivery to a secure site such as construction sites, hospitals, airports, or army/airbases, please give us as much information as possible about security procedures for delivery so we can ensure that your order gets to you.
UK (including Northern Ireland)
Our standard shipping is via ‘UPS standard’, which typically arrives the next working day. This is charged at a flat rate of £6.50 + VAT per order.
For quicker service, we also offer UPS Express (next morning delivery) and UPS Express Saver (guaranteed next day delivery). The prices for these services are quoted based on the weight and volume of your order and are calculated at checkout.
Weekend delivery. If you need your order delivered on a weekend, please call us to arrange this.
Same Day. If you are local to Northampton, you are welcome to collect from our offices. Please call us first to ensure your order is ready for collection.
Depending on your location, same-day delivery may be possible, so please call us if you need this option.
European Union and the Rest of the World
There are various UPS options for delivery, which are all calculated based on weight and volume at the checkout. These options are:
UPS Standard – delivery 2-3 business days from despatch
UPS Saver – next business day delivery
UPS Express – next business morning delivery
UPS Worldwide Express Plus – next business day by 12pm – European Union only – Rest of World is 2-3 days.
Returns, Exchanges, Refunds & Warranties
If there is any price difference, we will either credit you the difference or invoice you for the balance. Please note that the original shipping fee cannot be refunded.
In the first instance, please call us on 01604 422422 or email sales@idcardcentre.co.uk to see if we can resolve the problem.
If the item is deemed to be faulty, we will ask you to return the item for further assessment at our offices or directly with the manufacturer. Non-defective items will be subject to a restocking fee (20%).
Please note that items found by you to be incompatible are not deemed as faulty and will also be subject to a 20% restocking fee. Shipping costs are not refundable.
Our returns policy does not apply to special order items such as pre-printed cards, personalised lanyards, custom-programmed technology cards, software, name badges or an item we have ordered specially and does not appear on our website.
Please note that we can only exchange or refund items that are in their original resalable condition and packaging including all manuals, discs, cables or other items that were included in the sale. You should also include a copy of the original sales invoice.
If you have any questions about our returns policy please call or email us and we would be happy to help.
Unless otherwise stated, all products are covered by their original manufacturer’s warranty. We can also offer additional warranties, including on-site cover with many products.
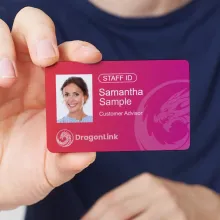
ID Cards & Lanyards
Find out more about the security features we can add to your ID Cards and badges.
All our products are carefully checked and packaged to prevent damage during transit.
For more information on ID Cards and Badge printing please click here
If we have your artwork on file or you supply us with print-ready files and a complete database by 2.30pm we can get them to you the next working day.
Contact Us
To unsubscribe from the mailing list, please log in to your account, select ‘Newsletter' from the menu bar on the right-hand side, and change the setting to 'No'.
Monday 09:00–18:00
Tuesday 09:00–18:00
Wednesday 09:00–18:00
Thursday 09:00–18:00
Friday 09:00–18:00
Saturday Closed
Sunday Closed
If your enquiry is urgent, please call our main telephone number (01604 422422) and leave a message. We will endeavour to get back to you as quickly as possible.
Alternatively, you can email us at: urgent@idcardcentre.co.uk
Phone: 01604 422422
Fax: 01604 422322
Email: sales@idcardcentre.co.uk
Post: 53 Tenter Road, Moulton Park, Northampton, NN3 6AX
Alternatively, you can use our live chat function at the bottom right of your screen.
Supplying Artwork & Data
For personalised lanyards, we require a brief of how you would like them to look, as well as a high-resolution version of your logo or design.
We will then produce a proof of the lanyards for you to approve or give feedback on before production begins.
If you have an enquiry about personalised key fobs, then please contact us by calling 01604 422422 or emailing sales@idcardcentre.co.uk.
If you have an enquiry about personalised badge reels, then please contact us by calling 01604 422422 or emailing sales@idcardcentre.co.uk.
Yes. We work in strict accordance with the Data Protection Act.
Data is stored on a secure server and deleted after use. Cards and printer ribbons displaying data are sent for secure shredding.
You can read more about our GDPR policy here.
Yes,
please click here to download our Artwork Guidelines.
CardExchange
To restore the Database Record. Click on the Data tab > Database Record.
This will now bring back the Database Record to your screen.
To restore the default layout. Click on the View Tab > Restore View > Restore Default.
Your view and CardExchange should now be back to their original view.
Make sure the spreadsheet connecting to that data is not open or isn't being used by anyone else (if it's stored in a shared folder).
In CardExchange, click on the Configuration tab > Card Designer > Data tab (on the left panel in the card design) > Storage Items.
Then in storage items, check that the print date/ counter are mapped to the print date or global counter in properties.
Simply go to the folder where your photos are stored. Right-hand click on the image, and go to Open With > Paint.
Then in Paint click on the resize button and reduce the image to 30%.
ID Card Printers - Help and Troubleshooting
Windows XP, Vista, 7
Click on the Start button in the bottom left-hand corner of the screen > Devices and Printers. In Devices and Printers, you will be able to see if your printer is connected to your PC.
Windows 8
Go to the home screen and start typing 'devices and printers', and a search bar will appear, and Devices and Printers will appear.
Windows 10, Windows 11
Type Devices and Printers into the search bar next to the start button.
Try unplugging the power from the printer and leaving it for 10 seconds, then plug it back in.
If this doesn't work, try plugging the USB cable into another port on your PC or laptop.
Does your PC or laptop have full admin rights? If not, then speak to your IT department to obtain rights.
- Unplug the printer, leave it for 10-15 seconds and then plug it back.
- There may be a card stuck - to check, remove the ribbon and check if a card is stuck. If it is, remove it gently, place the ribbon back into the printer, unplug and replug in the printer.
- Check the thickness gauge - if it's too wide, it will pull too many cards through. If it's too narrow, it won't pull any cards through. A setting of 30 or just above this is the best setting (if using standard PVC 760micron cards.)
- Check the ribbon is set correctly in the printer.
- Check what lights are showing on the printer or messages on the LCD screen. Is it a card issue, a ribbon issue, a cleaning issue or a general error?
- Check that there aren't any printer jobs stuck in the print queue. Open Devices and Printers > Click on the relevant printer. If there are print jobs in the queue, delete them by highlighting them and pressing the Delete button on the keyboard.
- Dirty card - ensure not to touch the card surface before printing, as oils from your fingers or general dust and dirt will affect the print.
- Wrong power supply - make sure you're using the power supply provided with the printer.
- Printhead failure - In rare and severe cases, the printer's printhead may have failed. We can send out an easy-to-install replacement printhead for next working day delivery.
Test the basics:
- Is the printer switched on?
- Is the printer the right way up? Cards will not pull through if the printer is laid on its side.
- Does it have a ribbon in it? Is the ribbon set correctly in the printer driver (particularly important if you use a monochrome ribbon on a freshly installed printer.)
- Is the USB cable plugged into the printer as well as the computer/ laptop?
- Are you using the correct power supply that came with the printer? Using another power supply will often cause printing problems due to insufficient voltage.
Readers - Technical Advice, Help and Trouble Shooting
See our detailed guide on programming the Inepro SCR708 reader.
Printing
There is an initial £30 artwork and database setup fee if you are setting up a new design.
It is then £1.50 minimum per card (the price is based on colour printing and dependent on print type).
- First, dye sub-printing: This print type is done on an Evolis Primacy, offers good print quality on simple designs and doesn’t print all the way to the edge of the card.
- Secondly, re-transfer printing: This print type is done on a Magicard Prima 4. This offers a better print quality along with printing all the way up to the edge of the card.
- The final option is litho/digital print: This offers a high-quality print all the way to the edge of the card. We would only suggest this for very intricate designs and high-volume orders.
Initially, we will ask you for a rough guideline for how you would like your card to look.
You can send us any artwork/sketching to work around if you have it and any logos/ banners you would like us to use.
We will then get to work with your design and provide feedback to you with the results.
We will communicate and send you
digital proofs of the design until you are happy with it and want to proceed
with printing.
All information for printing, such as names, logos, and photos, can be passed on via email to sales@idcardcentre.co.uk.
Please quote your order reference number so we can reconcile the data as quickly and efficiently as possible.
Once your design has been confirmed, we will be able to send over a spreadsheet template for you to fill in with all the information for printing. This will have a column for each personalised field within the card, along with a unique identifier column and a column for the file names of the photos.
Once this is all complete, you can email it to sales@idcardcentre.co.uk for
printing. Please quote your order reference number so that we can reconcile the data as quickly and efficiently as possible.
We, as a company are registered with the information commissioner’s office and strictly follow data protection laws.
All the information you pass onto us will be stored on an internal network, which is all password protected, and will only be stored for the necessary period.
If you wish to remove any data, you can call 01604 422422 or email sales@idcardcentre.co.uk, and we can arrange it.
We do keep a backlog of recent Bureau data for ease of reprints.
Moving forwards from your first order, we will keep your design stored and ready to be used again.
When you wish to order again, if you send all the information for the cards you would like to be printed via email to one of our team members or sales@idcardcentre.co.uk either as a message or using the spreadsheet template, we will print the cards as soon as possible.
Any minor design changes can be made in the future at no extra cost, such as the movement of text fields, font changes, logo changes, etc.
However, significant design changes or re-designs may incur a second £30 artwork and database set-up fee.
All of our shipments are sent via UPS as standard.
If you would specifically like your order to be sent via Royal Mail, please let us know, and we can arrange this.
Evolis Printers
A driver is a software used to communicate with the printer through the computer. It allows you to manage ribbon choice, print intensity, contrast, insertion modes, magnetic, lamination, etc. The driver also broadcasts internal notifications and information from the printer.
The driver must be installed before the first use
of the printer and must be compatible with the target operating system.
Administrator rights are required for its installation.
You can find driver updates for different manufacturers below:
For mechanical, adjustment and warranty reasons, each printer has a specific print head that is only compatible with that model, each with a specific part number.
To print an Stt card on your Evolis printer, go to devices and
printers->printer properties-> tools-> technical test card.
However, if you are using an
Evolis Primacy, you will need to open the Evolis print centre, select the
printer, go to system details, test cards and press the ‘print technical test
card’ button.
Firmware is resident software embedded in flash memory on the main board, which operates as a layer between the hardware and the software. It is mainly used to manage the resource directly and is provided by Evolis for exclusive use with its printers.
A regular update is strongly
advised to receive all the latest improvements. Each printer has its own
firmware.
You can find all the firmware updates for each relevant printer on the Evolis website via this link http://www.evolis.com/drivers-support.
Select the printer you are using and download the
relevant firmware.
Yes, you can.
The power supply
for all Evolis models is uniform:
- Input AC: 11-240V – 1.8A
- 50-69Hz
- Output: 24V, 3.0A
Commands can be sent to your Evolis printer to adjust internal parameters, read internal parameters and develop the application. You can send commands to your Evolis printer in two ways.
1. Devices and printers-> Printer properties-> Tools-> Direct command to the printer – This method only allows you to send commands to the printer. Answering is not possible.
2. Devices and printers-> Printer properties-> Tools->
Dialogue with printer – This method allows commands and answers to be sent and received with the printer.
The only exception to this is the Evolis Primacy. To send commands to a
Primacy, you need to open the Evolis Print
centre, select the printer, go to
maintenance, and do printer commands. Here you will be able to input printer commands.
A development kit is available for download to develop your own applications and monitor all Evolis printers. This will provide you with all the
tools, escape commands, DLL and code samples you may require.
To obtain this, you will need to contact Evolis.
The resolution of Evolis printers is: 300 dpi (11.8 dots/mm)
All PVC, composite PVC,
composite PET, composite ABS*, and special varnished* cards can be used. Please
note that printing quality may vary depending on the card manufacturer. Paper
cards can only be used with the Tattoo model.
* Subject to special conditions
All
Evolis printers correspond to the CR80 standard sizing of 54 x 86 x 0.76 mm.
No. As Evolis printers use infrared sensors to synchronize the cards, transparent
or translucent cards cannot be used with Evolis printers.
All printers with an LTP port can be networked using a print server.
The
only Evolis printer with the option to print on a CR-79 card is the Pebble4. You can print on both CR79/80 cards with this option active.
The Stt card will provide you with essential specifications regarding
the printer (serial number, firmware version, print head kit number, position
of the image, number of prints, number of cleaning cycles, numeric values of
different sensors)
Yes. The printer can be linked to an IP or an IPv4-based network using its Ethernet port.
This can either be done when
performing the driver set-up or manually (an embedded web server and
documentation are available, in which you can edit all the relevant Ethernet
settings).
During printing, if a card remains in the feeder or gets stuck in the
middle of the printer, please check the following:
1.
Has the printing job been correctly sent to the
printer? If an error has occurred, the Windows toolbar will display a red
circle with a question mark on the printer icon.
2.
Is the card thickness gauge adjusted to the
correct thickness?
3. Does the printer need to be cleaned?
4. Are the cards sticking together, and do they meet all compatibility requirements of your printer?
First, make sure you have updated the drivers and firmware.
Then try printing using a different
application and changing the USB port. If this doesn’t work, then it might be
that your main board needs replacing. Please get in touch with us.
Firstly, check the ribbon is
genuine and not faulty, then check the print head kit number is correct in the driver's printer ID section, then reduce the contrast/intensity and check the offset settings.
You should be able to simply open the lid of your printer, remove the faulty or finished ribbon and put an alternate one in its place.
The ribbon will then
automatically configure itself so it’s ready to print. All other information
about ribbon installation is available in your printer’s user guide.
Alternatively, we have various ribbon install videos available to watch here on YouTube.
YMCKO refers to a 5-panel ribbon. Each letter refers to the colour of a panel:
Y- Yellow
M- Magenta
C- Cyan
K- Black
O- Overlay
- Black
- Blue
- Green
- Red
- Gold
- Silver
- Scratch-Off (not for use in the Tattoo2)
- White
- Black Wax
ID Card Centre and Evolis do not recommend using generic ribbons. Evolis' manufacturer warranty contains strict conditions against using generic ribbons and clearly states that only genuine Evolis ribbons should be used with their printers.
Any use of a generic ribbon will not only expose you to printing problems but will also make any printer warranty you have void.
No support request will
be entertained if you have used a generic ribbon. Here at ID Card Centre, we will only supply you with genuine
Evolis ribbons.
You will first need the newest firmware for your printer.
Once you have done this, you need to download the firmware by clicking it on the website and unzip the file onto your hard disk.
You will then need to connect the printer to the computer and switch it on. Once this is done, click on the. EXE file and carefully follow the instructions on the screen. You can then select your printer and click “update firmware”.
You can tell when the
update is complete as you will hear the up-and-down movement of the print head.
If you find that your ribbon has been
cut during the printing process, please carry out the following checks:
1.
Clean the printer
2.
Go to driver properties-> graphic menu, and check
to see if the contrast or quality values are too high
3.
Try using a different ribbon; as it may be that
the one you were using is faulty
4.
Make sure that you are using a genuine Evolis
ribbon (see FAQ ‘How can we tell if we have a genuine Evolis ribbon?’)
If you carry out all the following checks and the problem
persists, please contact us.
If the printer skips ribbon panels during your printing
process, please check the following:
1.
Make sure you are using a genuine Evolis ribbon
and not a generic one (see FAQ ‘How can we tell if we have a genuine Evolis
ribbon?’)
2. Make sure you have updated your printer with the latest firmware.
3.
Within the Driver properties/ Graphic screen, ensure that the selected ribbon type is correct for the ribbon you use.
4.
With the colour
ribbon placed inside the printer. Go to driver properties-> Tools->
Bi-directional communication screen and send the following command, which will
adjust and calibrate the colour sensor
‘Sa;c’
If the problems persist after following these steps, please
contact us.
No,
it is impossible to print with a YMCKO ribbon on a card with these ribbons printed on it. The ink can only be applied once on each side of the
card.
To
limit print blemishes, do a full clean of your printer. Clean the full
interior, rollers, and print head and make sure the cards you are printing on are
free from scratches, marks, and dust.
No, unfortunately, the Evolis printers do not have RFID technology. Therefore, the ribbon type
must always be set within the driver.
Evolis has a ribbon recognition system to identify genuine Evolis ribbons. This was implemented through firmware (f/w 0804 onwards) for the Pebble4 and Dualys3.
The mark will not be visible on the ribbon to the naked eye but can be found on the Evolis test card. Next to the firmware number, there will be a data string, e.g. 0804 f:200 E.
The E indicates Recognition ON - Evolis ribbon
detected. Should the data string read 0804 f:200 EF. The EF indicates
Recognition ON - Evolis ribbon not detected.
Try reducing the mono head
settings, replacing the ribbon and checking for printhead faults or incorrect
angle adjustment.
White lines on the printed cards mean that the print head cannot heat the ribbon in that area (the ink cannot be diffused/applied correctly onto the card surface).
This issue may arise from a dirty, faulty print head. You will need to clean the printhead if the problem persists.
Please contact us as it is probably the case that you need to change your
print head.
The white margin on the edges of your printed card can be reduced by changing your offset settings.
A technical process will allow you to move the position
of the image and increase/decrease the number of printed lines on the card.
If the colours on the
printed cards are too dark or too light, the following should be checked:
1.
Are the contrast or intensity settings too high
or too low? (this can be checked on the print settings in the Evolis Print centre)
2.
Is the power supply an Evolis one?
3.
Make sure that the Evolis power supply isn’t
faulty
4.
Make sure that the print head is installed
correctly.
If your issue remains after you have checked
these things, please contact us.
Yes, the printer will indicate when cleaning is required. For the Pebble4 and Dualys3, a light will come on after 1000 prints, and for the Tattoo2 the cleaning light will come on at 400 prints.
It is however recommended by Evolis
that you perform a cleaning cycle every time you change the ribbon.
This issue relates to the quality of the card. The card’s flatness (this is particularly important with the dye sublimation printers) is thinner around the chip area.
The only way in which you can resolve this defect is to use higher-quality cards.
The data that can be encoded on the track depends on the
encoding format/standard:
- ISO1- accepts up to 76 alphanumeric characters, from A to Z
and from 0 to 9
- ISO2- accepts up to 37 numeric characters, from 0 to 9
- ISO3- accepts up to 104 numeric characters, from 0 to 9
The
easiest way to visually determine if a stripe on a card is HICO or LOCO is by
checking the colour of the stripe. HICO
stripes are black, and LOCO stripes are brown.
If you are experiencing this issue, please check the
following:
1.
Check the card is positioned properly in the
card hopper (see figure under the feeder)
2.
Carry out a full printer clean
3.
Go to driver properties->tools->encoder
settings and check if the coercivity is the same as that of the magnetic cards
(stripe colour) and click the ‘set’
button before clicking ok
4.
Check that the data is correct (number of
characters)
If the issue remains once you have carried out all these
checks, please contact us.
If no LED light is on, including the power button, please check the following:
- Is the power supply connected to a live electrical wall socket?
- Is the correct power supply being used? (We highly recommend you use an Evolis one).
- Is the power supply faulty? (The Evolis power supply displays a green light when operating correctly).
- Is the power supply connected to the printer correctly?
Each Evolis printer comes with its own manufacturer warranty. However, this varies with different printers; you can see the warranty each Evolis printer comes with on our website.
Yes, the printer will indicate when a clean is required.
For the Pebble4 and Dualys3, a light will come on
after 1000 prints, and for the Tattoo2, the cleaning light will come on at 400 prints. It is, however, recommended by Evolis
that you perform a cleaning cycle every time you change the ribbon.
Evolis only have the following few
cleaning cards available, the A5002 cleaning cards, Evolis long T cleaning card
ACL004 and Evolis adhesive cleaning cards ACL003.
Each of the cards can be used for the
following machines:
·
A5002 –
Tattoo2, Tattoo RW, Pebble4, Dualys3, Securion, Quantum 2.
·
ACL003 –
Zenius, Primacy
·
ACL004 –
Zenius, Primacy
These cleaning cards are available on our website and can be
purchased either individually or in kits with other cleaning supplies such as
cloths, swobs and pens.
To start the cleaning cycle, open the Devices and Printers Screen.
- Right-click on the printer driver and open the Printer Properties. Go to the Tools tab and click the Printer Cleaning button.
- Remove the printer ribbon, replace any cards in the hopper with a cleaning card and adjust the card thickness gauge to its maximum setting.
- The card will then pass back and forth through the printer, cleaning the transport rollers, cleaning roller, print head and any encoding heads.
- Once this is finished locate and remove the cleaning roller. Using a cleaning wipe gently remove any dust from the surface before replacing it in the printer.
- Now turn off the printer and use a cleaning swab to gently clean
the print head. Wait a while before closing the lid so any cleaning solution
can evaporate. The cleaning cycle is now complete.
Yes. You should manually clean your printer to clear persistent card feeding, printing, and encoding issues, thoroughly clean a very dirty printer, or clean the unit after a spare part replacement.
Manual cleaning should be carried out after a standard cleaning cycle. Manual cleaning is carried out as follows. Firstly, open the lid and remove the ribbon and card hopper.
Secondly, hold down the ‘clean’ button on the printer
driver, making the internal rollers rotate. Finally, place a cleaning
card against each roller, applying pressure (use several cleaning cards if
required).
Firstly, make sure you have printed an ‘Stt’ (technical test card, within devices and printers -> printer properties -> tools) card with the faulty print head (Keep this card as it must be sent with faulty print head under warranty). You can then proceed to remove the faulty print head.
To do this, you simply need to twist and pull it out of its bracket inside the printer. You will then need to carefully disconnect the cable from the print head to remove it from the printer. You cannot reconnect the cable with the new print head and fix it into the bracket as the old print head was.
You will now need to start a dialogue with the printer (devices and printers -> printer properties -> tools) and input the (P)rinthead (k)it (n)umber in the format ‘Pkn;xxx-xxxxxxxx-x’.
(This can be found on a sticker located on the print head). You will then be asked to perform a cleaning cycle; this process is then complete.
Please note, however, if you are doing edge-to-edge
printing, the offset settings may also need adjusting.
Magicard Printers
A driver is a software used to communicate with the printer through the computer. It allows you to manage ribbon choice, print intensity, contrast, insertion modes, magnetic settings, lamination settings, etc. The driver also broadcasts internal notifications and information from the printer.
The driver must be installed before the first use of the printer and must be compatible with the target operating system. Administrator rights are required for its installation.
You can find driver updates for different manufacturers below:
Magicard: https://support.magicard.com/
Evolis: http://www.evolis.com/drivers-support
Datacard: https://www.entrustdatacard.com/resource-center/drivers-and-downloads
IDP: https://www.idp-corp.com/index/bbs/board.php?bo_table=s4_1&cate=11
Zebra: https://www.zebra.com/gb/en/support-downloads/printers.html
HID Fargo: https://www.hidglobal.com/drivers
Matica: https://www.maticacorp.com/corporate/support-download/#downloads-tabs-section
Firmware is resident software which is embedded in flash memory on the main board and that operates as a layer between the hardware and the software. It is mainly used to directly manage the resource and is provided by Evolis for exclusive use with its printers.
A regular update is strongly
advised to receive all the latest improvements. Each printer has its own
firmware.
You can find all the firmware updates for each
relevant printer on the Magicard website via this link http://support.magicard.com select the printer you are using and download the relevant
firmware.
You will first need to find the
newest firmware for your printer from http://support.magicard.com
you can then follow the onscreen instructions to install your firmware.
This may be one of two possible faults. Firstly, it is a
common error to plug the printer in prior to running the driver installation.
To correct this, you will need to remove/uninstall
the driver with the USB still connected, disconnect the printer once it has been uninstalled fully and start over.
The second reason this issue may arise is if you are using an incorrect power supply. This is a very common
and simple mistake to make if you upgrade to a newer Magicard printer.
If you find your printer to be printing the wrong colour setting, please check the following:
1. The driver
may be set to the incorrect setting. To check this setting, open the
printing preferences tab from devices and printers, you can then go onto ‘card
front’ and ‘card back’ and select your custom print settings.
2. The second
reason this may be occurring could be as the RFID chip in the ribbon has a
fault and is therefore not being read correctly by the printer. In which case,
please try another ribbon.
The final reason, if your print
settings are correct and you change the ribbon, and the fault persists, would be
that your printer’s RFID antenna has developed a fault. In which your printer will need to have a full repair,
please contact us for any further detail.
This is most likely because there is a large area of colour in your card design, and your print settings aren’t adjusted correctly to cope with this. If a particular colour is very prominent in your design, then you will need to make changes to settings from within the printer driver.
The prominence of a particular colour in a design will lead to the print head
getting too hot on that particular part of the ribbon, causing it to snap. To
fix this you will need to go onto the printer driver -> Printing
Preferences -> Advanced tab -> Print head power. You can then reduce the YMC
value (we suggest by about 5, the default should be 50).
We would suggest that you
regularly clean your printer using the appropriate cleaning card to ensure that
your print quality is kept to the highest standard. We say this should be done at
least every time you change the printer ribbon.
My Account
You can reset your password for your account.
To edit the details of your online account, please click here to login, then select ‘Edit Account’ from the menu bar on the right hand side.
Our payment terms are 30 days from the invoice date.
Please click
here to register an account. This
will enable you to retrieve details of past orders, save items you’re
interested in and make reordering even quicker.
Card Printing
There is an initial £30 artwork and database setup fee if you are setting up a new design. Prices then start from £1.85 per card for full colour to one side based on 100 cards.
FAQs
Our high-quality cards are printed on premium white PVC Fotodek cards to
ensure a superior print finish and longer lasting cards. All of our cards
have a lifespan of at least 3 years but typically last longer than this.
If you require a much longer lasting card let us know so we can recommend
suitable print and lamination options.
Your cards can feature any design and data that you wish, although
please note our guidance on fake IDs above, including photos, images, text,
barcodes and certain security features.
If you're looking for something a little different, we have a range of
coloured card options however these are not always suitable for printing photos
and certain logos on to so if you're hoping for a vibrant, full-colour card we
can talk you through various options and solutions. Please contact us to discuss.
You may choose to design the cards yourself or alternatively, our bureau team can design them for you and will work closely with you to achieve the perfect layout.
Yes. If you need your cards to be
smart cards we can provide contactless, chip and magnetic stripe cards
that are compatible with most systems, in particular, MIFARE®, Paxton,
HID, Cotag, Indala, Keri, ACT, PAC, TDSi and Guardall. Again, please
contact us to discuss your
requirements.
We can incorporate security features into your ID card design
including guilloche, UV, micro text, holofoil or hologram, embossing and
tipping as well as signature panels (with additional anti-forgery techniques
built into that if required). Finally, if you need braille on your cards we can
offer this as well!
Yes, our printed card call-off service allows you to prepay for a minimum of 50 cards and then request however many you need when you need them. For more information, visit our call-off service page.
Due to the nature of all thermal print processes, the use of pure white elements on a card design can result in what we would call ‘compensation fade’ where faint lines are visible beside the white element. This occurs as a result of the heating elements in the printer momentarily cooling as the white elements don’t require any print on the card. Then the elements must heat which, although is a very fast process, can’t happen instantly- in the same way that a radiator doesn’t reach temperature immediately when switched on. The effect is only minor in most cases but is nevertheless something to consider when designing your ID cards.
To minimise this effect, try to avoid placing pure white elements on a field of solid colour. Instead of pure white areas, consider using a slightly off-white colour that still appears to be white but requires print onto the card. Below is an example of a design where the effect has occurred and how it could be avoided or minimised.
| On this design, you can see that there are very faint faded areas in line with the ‘Simple Sample Co.’ logo because it is a pure white element. | Here, the design has been modified slightly to account for this by removing the block colour background. Block colour backgrounds are still achievable, by all means. Just ensure that any white areas have a slight grey tint so that print is still required in that area. |